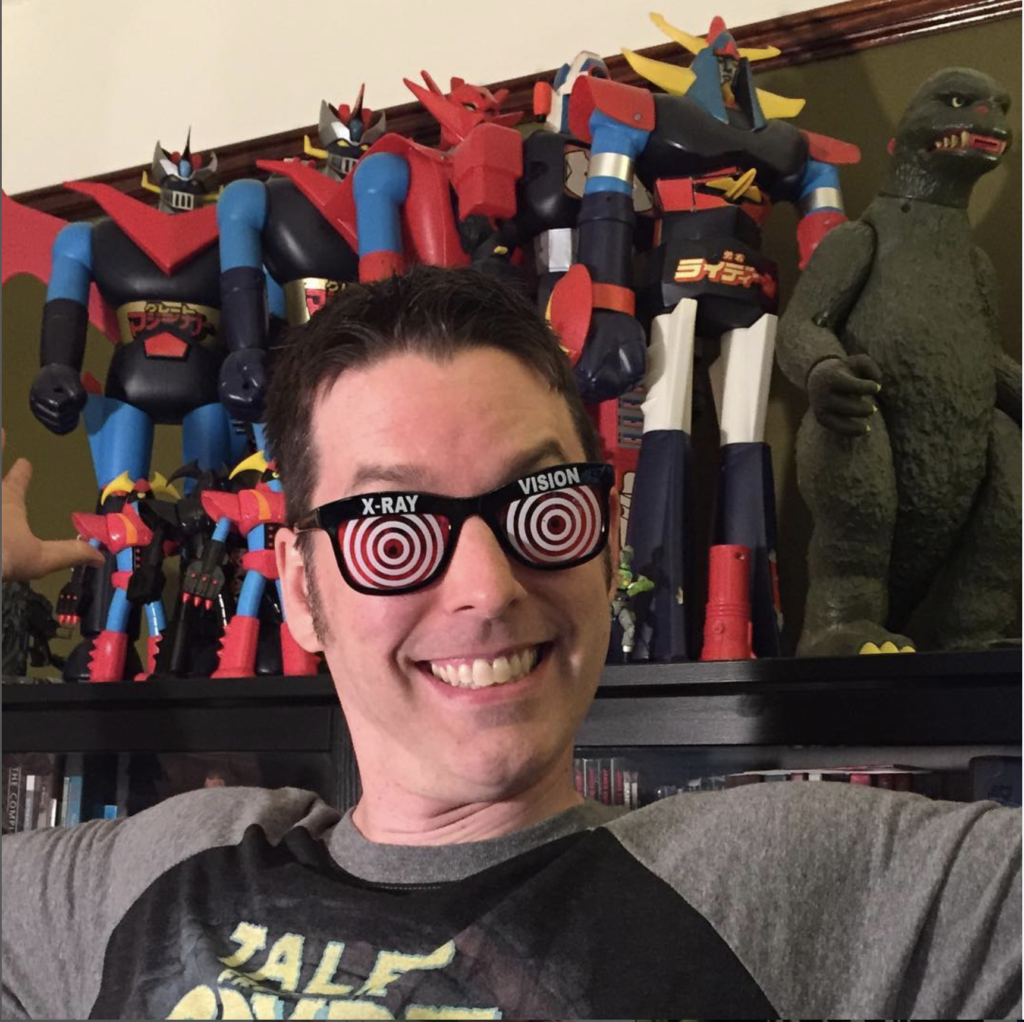
When I was four, I was lucky to have lots of toys, but nothing sparked my imagination like Mattel’s popular Japanese toys, the Shogun Warriors. Battling my dad with missiles and rocket fists left a huge impact on my impressionable mind that I still felt almost 40 years later. I was so inspired that in 2014, I set a goal to create my own vinyl toy based on the Shogun Warriors, and a year later, I was shipping Vulkira around the globe.
For every inspired kid and for every aspiring adult, here are the steps I took to bring my imagination to life.
Step 1: Conceptualize and finalize the design
In 2014, I was creating posters for bands. I had a friend in the scene who struck a deal with a toy manufacturer in the United Kingdom — he would create these cool characters based on Japanese monsters and Ed Roth’s Rat Fink, and the U.K. manufacturer loved it, and I thought it was so cool. I knew I wanted to do something like that.
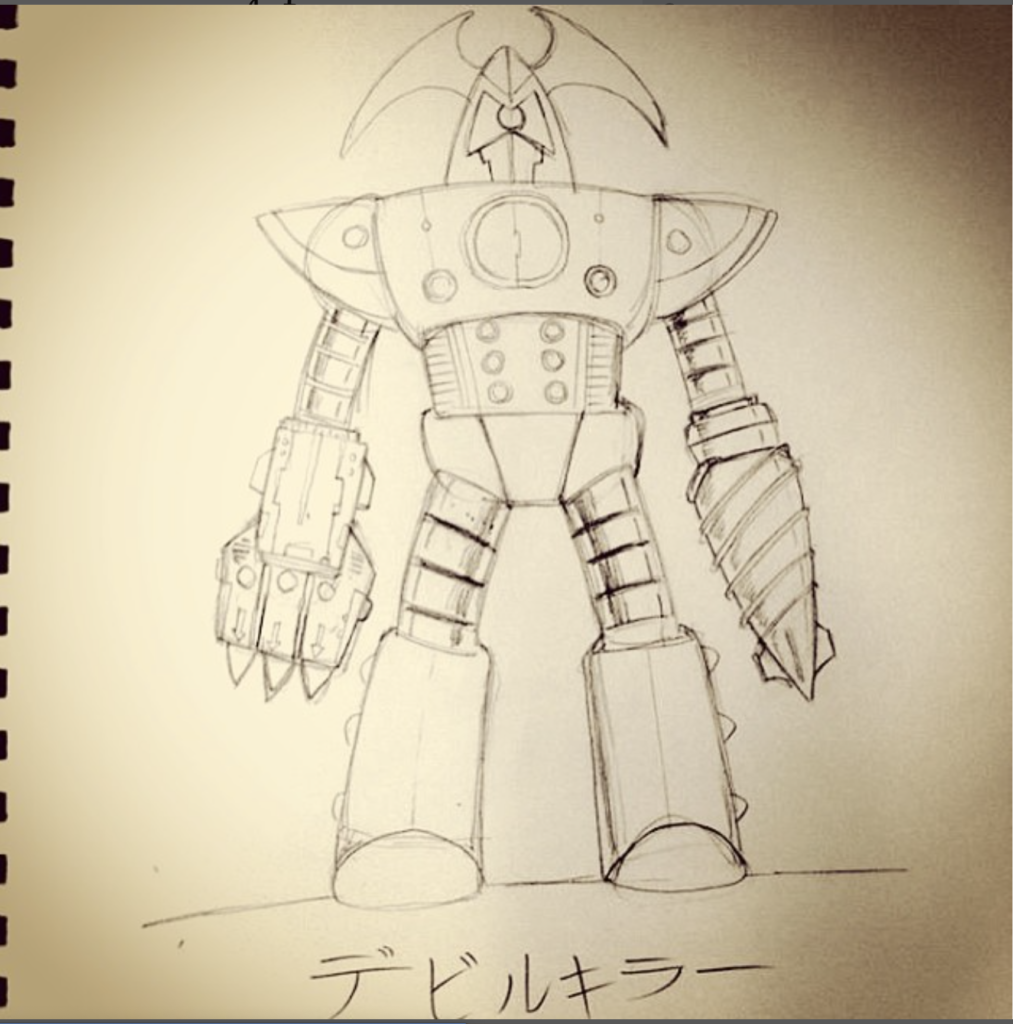
Vulkira amalgamates my love for Japanese culture and the original Shogun Warrior designs. I put my own spin on the original stiff-armed designs (this was before I came up with Vulkira’s backstory), and for a month or two, I conceptualized, using old robot designs as the base.
I posted sketches to Facebook, and I got really good feedback as I refined the head and body.
I don’t know when I thought, “That’s it, it’s finished.” It was just an intuitive thing — Vulkira seemed more refined as I got more feedback. When you know, you know.
Step 2: Create buzz and following
Buzz started with the feedback from social media. Back then, I didn’t know how essential making my own Facebook page for Vulkira would be. Creating buzz was easier before the Facebook algorithm buried posts by anyone trying to make money. I would also buy ad space on popular vinyl toy sites and make my own web banners.
At first, making Vulkira was checking off an entry on my bucket list, but everybody was like, “What’s this guy’s story?” So I started coming up with all these other characters and a little bit of backstory, even after Vulkira was done. That helped keep interest from start to finish.
Step 3: Reach out to manufacturers
I did some research of my own, but ultimately I decided to ask my friend for the U.K. manufacturer’s contact information. They looked at my finalized sketches and were like, “Oh yeah, this is awesome.”
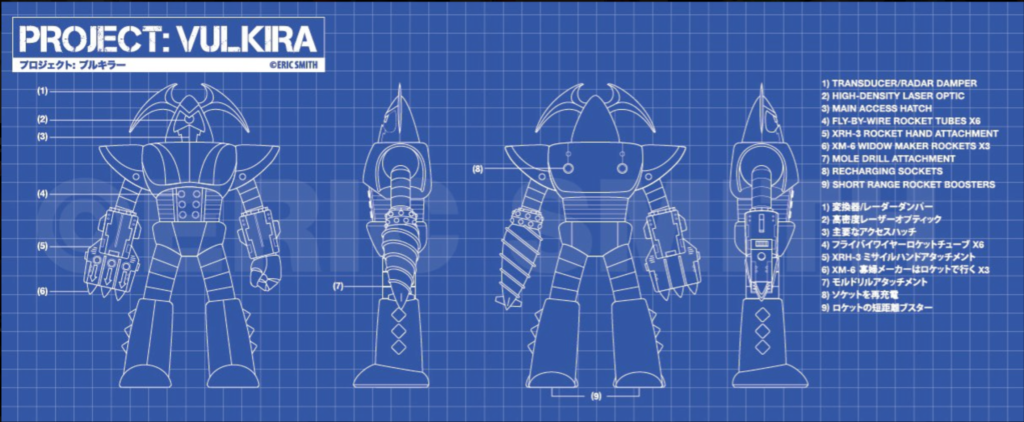
Step 4: Submit tight spec drawings to the factory for sculpting
I discussed the sculpting process with the U.K.-based manufacturer’s main contact. So I sent them the final designs, but I also had to send them spec drawings, which are drawings of the toy’s dimensions and measurements, from the top, side, and front views.
The main contact sent my sketches and drawings to their factories in China for the sculpting process. They emailed me a few days later saying a sculpt was completed.
Step 5: Approve the sculpt and obtain 3D prototype images
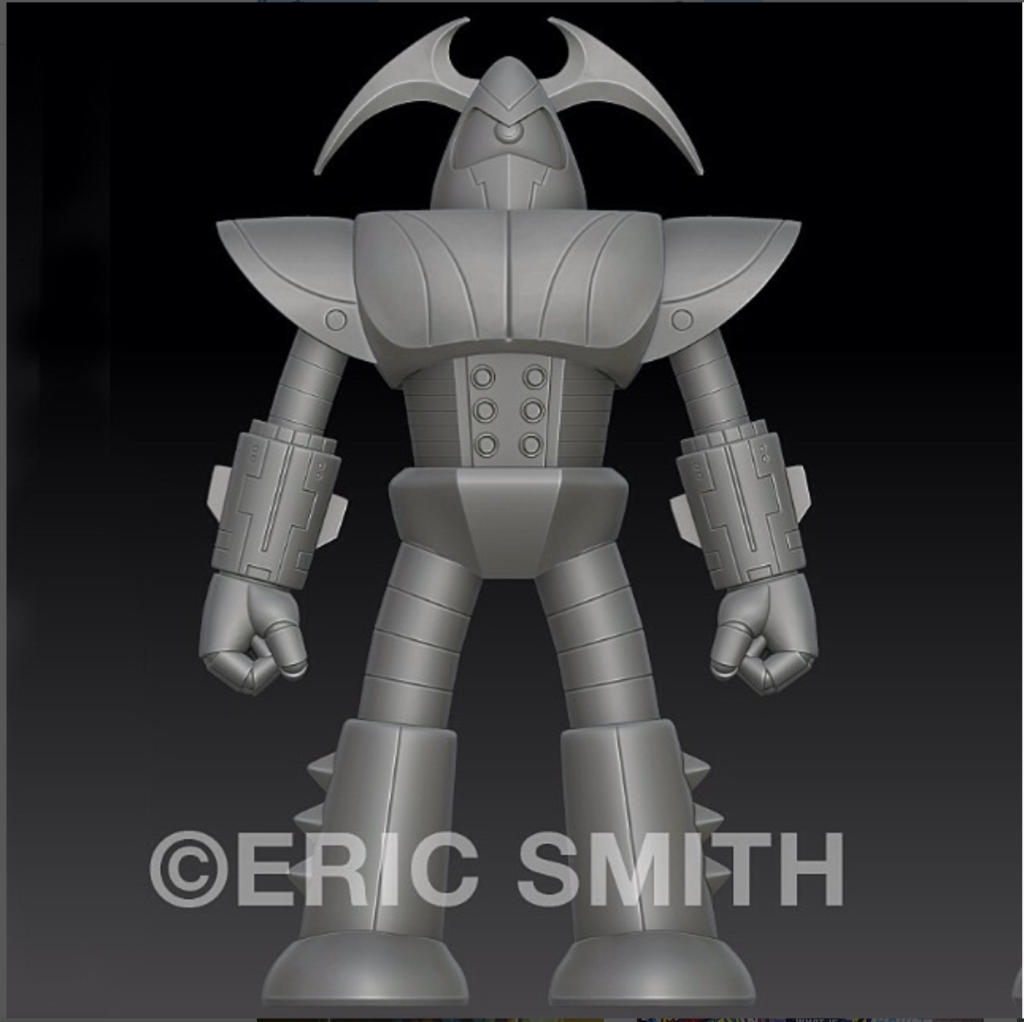
The first sculpt is a physical prototype of the final base model for Vulkira. After the manufacturer sent me 3D images of the first sculpt, we began a nine-month process of fine-tuning the details of the model.
In the end, we settled on the final design: a master mold that would be the complete base model for every Vulkira toy.
Step 6: Research crowdfunding options and plan a marketing campaign
30 days. $10,000. Boy, oh boy. Without the buzz I’d already started, I don’t know if Vulkira would have come to life.
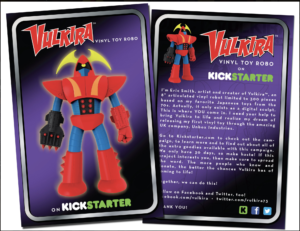
My deal with the manufacturer meant I had to do a Kickstarter to raise the funds, because they weren’t going to produce Vulkira for free. But I got to keep all the profit from Vulkira’s production.
I needed a plan before I started marketing the Kickstarter, because crowdfunding becomes a full-time job — posting milestone updates on Facebook every day, sharing ads to more toy sites, watching the up-and-down of pledges as the deadline nears closer and closer …
If I was a penny under $10,000, I would’ve lost all the funding. They say it’s best to already have the money you need, or at least half, but I didn’t, so the process quickly became more stressful.
Step 7: Build a crowdfunding campaign on Kickstarter and commence marketing blitz
My creative background in production, print design and children’s products helped me give Vulkira a real “fun” element that made crowdfunding and marketing smooth.
My favorite part of this step? The kids of Kickstarter backers sending in crayon drawings of Vulkira. I even made a drawing of Vulkira for people to download and color in. People’s artwork of Vulkira lives in my heart, and one day it will be framed on my wall.
Step 8: Reach your funding goal
SUCCESS! Grab a drink and kiss your family!
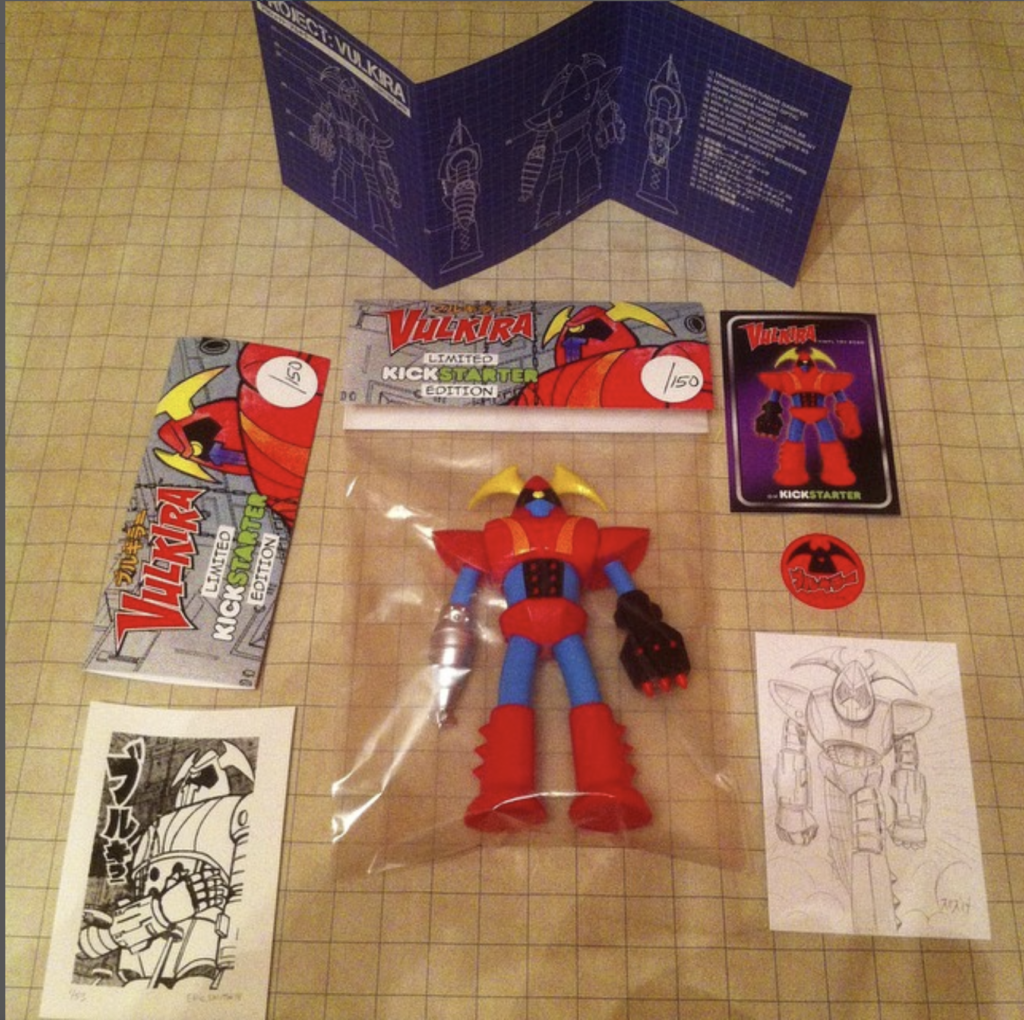
Step 9: Collect payments and fulfill orders
Here, my creative background met the business side of things. I did a lot of learning about planning, budgeting and order fulfillment. Now I have a better understanding of the business that makes my work with Dragonfly Editorial (and any other job, really) possible. Read the terms of service and general rules about your crowdfunding platform, folks!
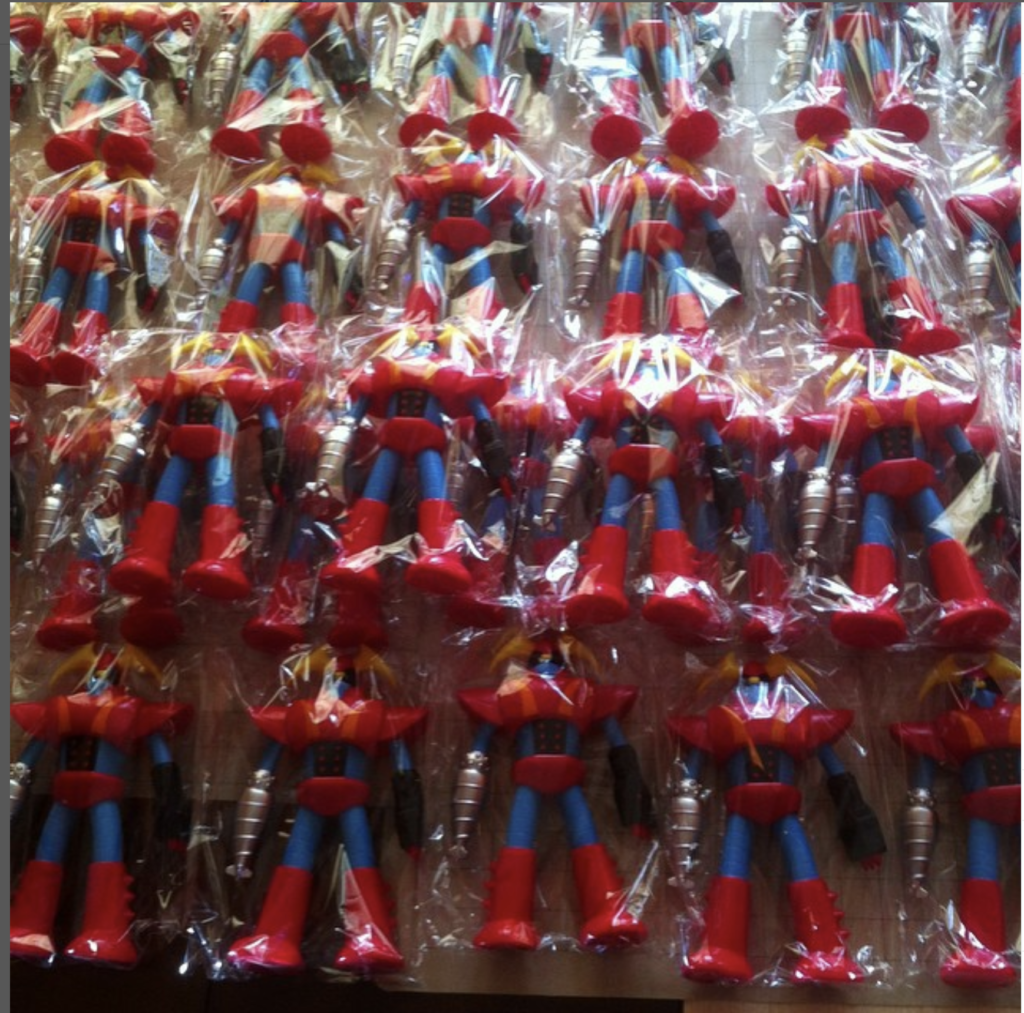
Step 10: Ship globally
After everything, I shipped out Vulkira in 2015.
If you are an independent creator or a member of a small team, then you want your clients and partners to meet you halfway, because you don’t have as many hands or resources. Help people fully understand what they need from you to get the job done!
Former Dragonfly Eric Smith wrote this post with help from Dragonflies Jeremy Person and Rachel Thompson.